vscode使用
学习记录上篇文章讲述了GitHub Desktop的使用,GitHub Desktop对完全的新手很友好。
本篇文章讲述了以vscode为例创建项目上传项目到github。
安装vscode
github创建仓库
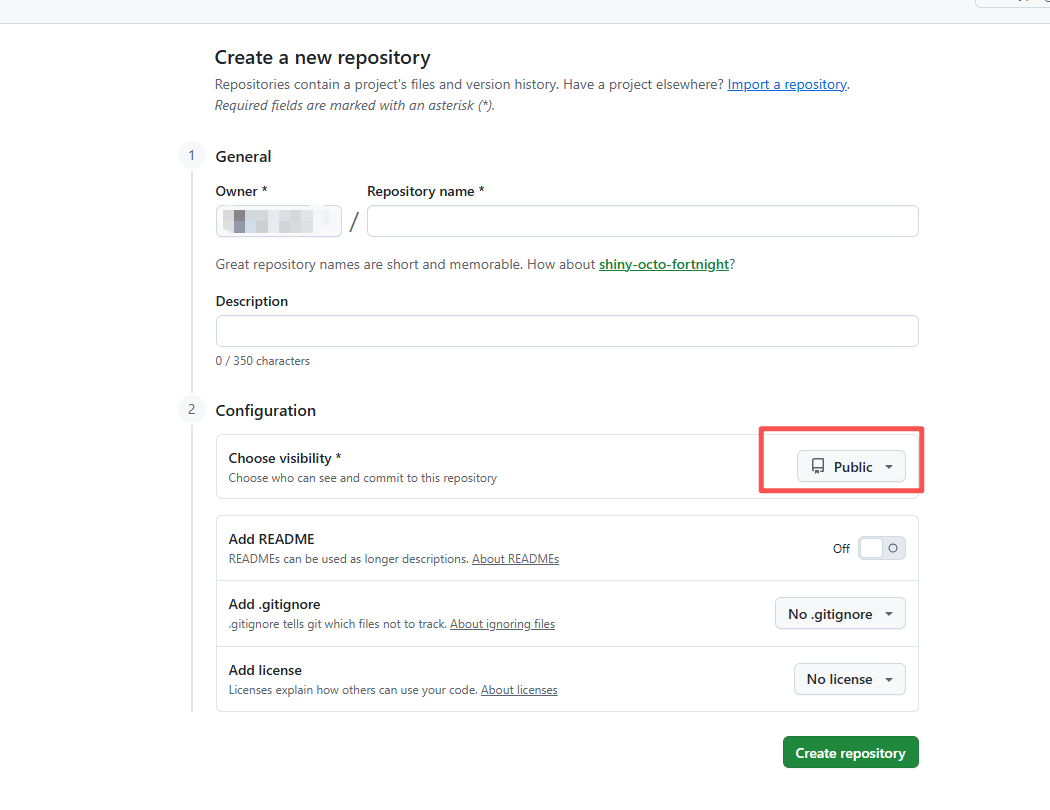
登入github,从左侧选择All repositories,然后选择new repositories。 如图,仓库名称自定义,可见必须选public,因为博客是公开的,所以内容需要公开,外部才能直接访问。其余默认即可。
打开仓库,尝试手动随便上传个文件到仓库

配置vscode
打开vscode,点击查看——终端,打开终端。
输入git –version,查看电脑是否有git。如果没有请自行安装后进行后续步骤。
配置如下信息让vscode知道你是谁
git config –global user.name “你的GitHub用户名”
git config –global user.email “你的GitHub邮箱”
配置vscode代理(可跳过)
由于国内一定概率连接不到github,可以先走下一步克隆仓库,如果克隆不下来,再回到这一步配置代理,走机场。
先清除http和https的代理
git config –global –unset http.proxy #清除当前http代理
git config –global –unset https.proxy #清除当前https代理
git config –global –get http.proxy #没有输出说明清除git代理成功
git config –global –get https.proxy #没有输出说明清除git代理成功
git config –global http.proxy http://127.0.0.1:端口 #端口请查看自己电脑配置,每台电脑不一定一样
git config –global https.proxy http://127.0.0.1:端口 #端口请查看自己电脑配置,每台电脑不一定一样
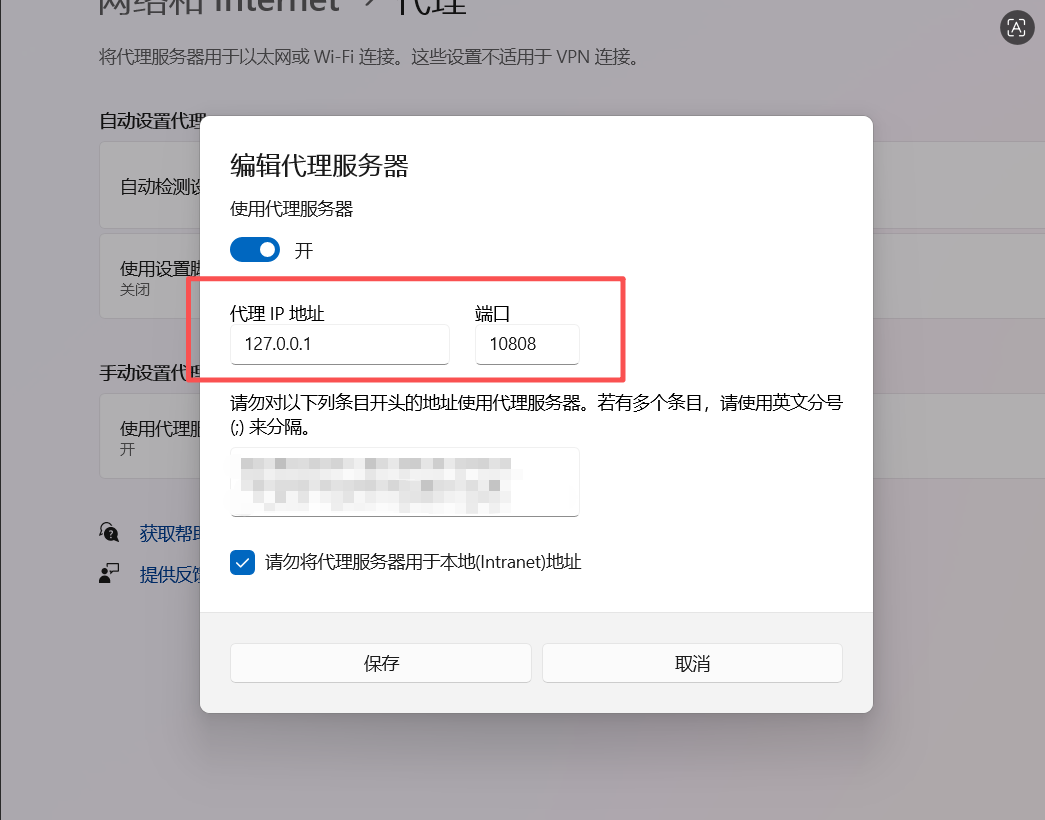
git config –global –get http.proxy #有输出说明设置成功
git config –global –get https.proxy #有输出说明设置成功
克隆仓库
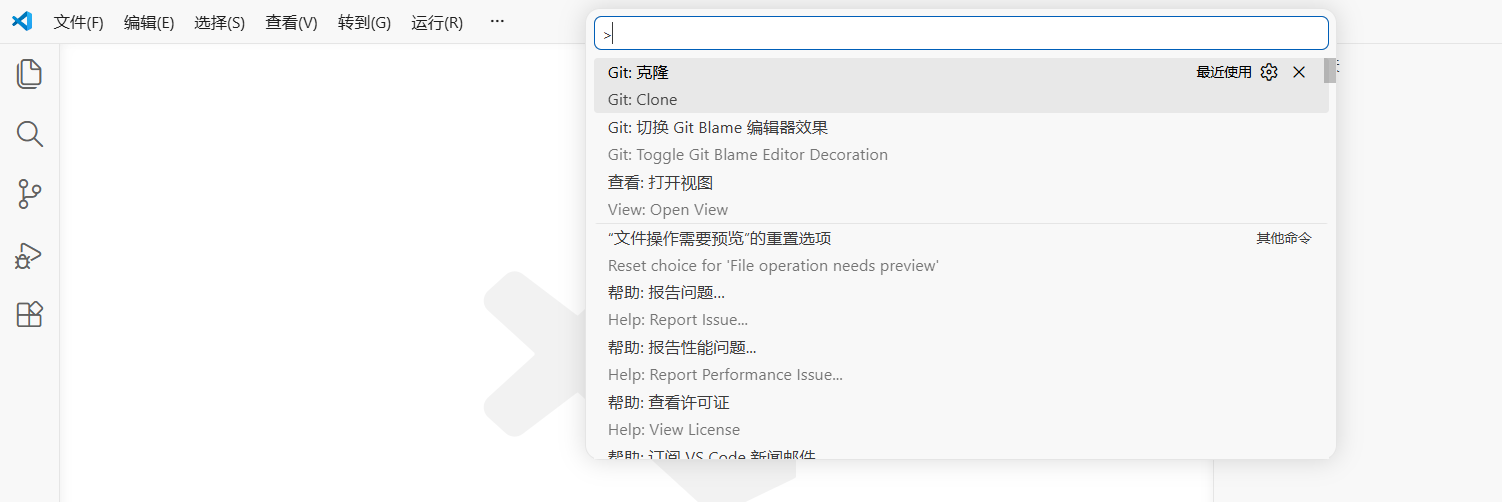
开始clone仓库,如图地方输入>clone,选择克隆
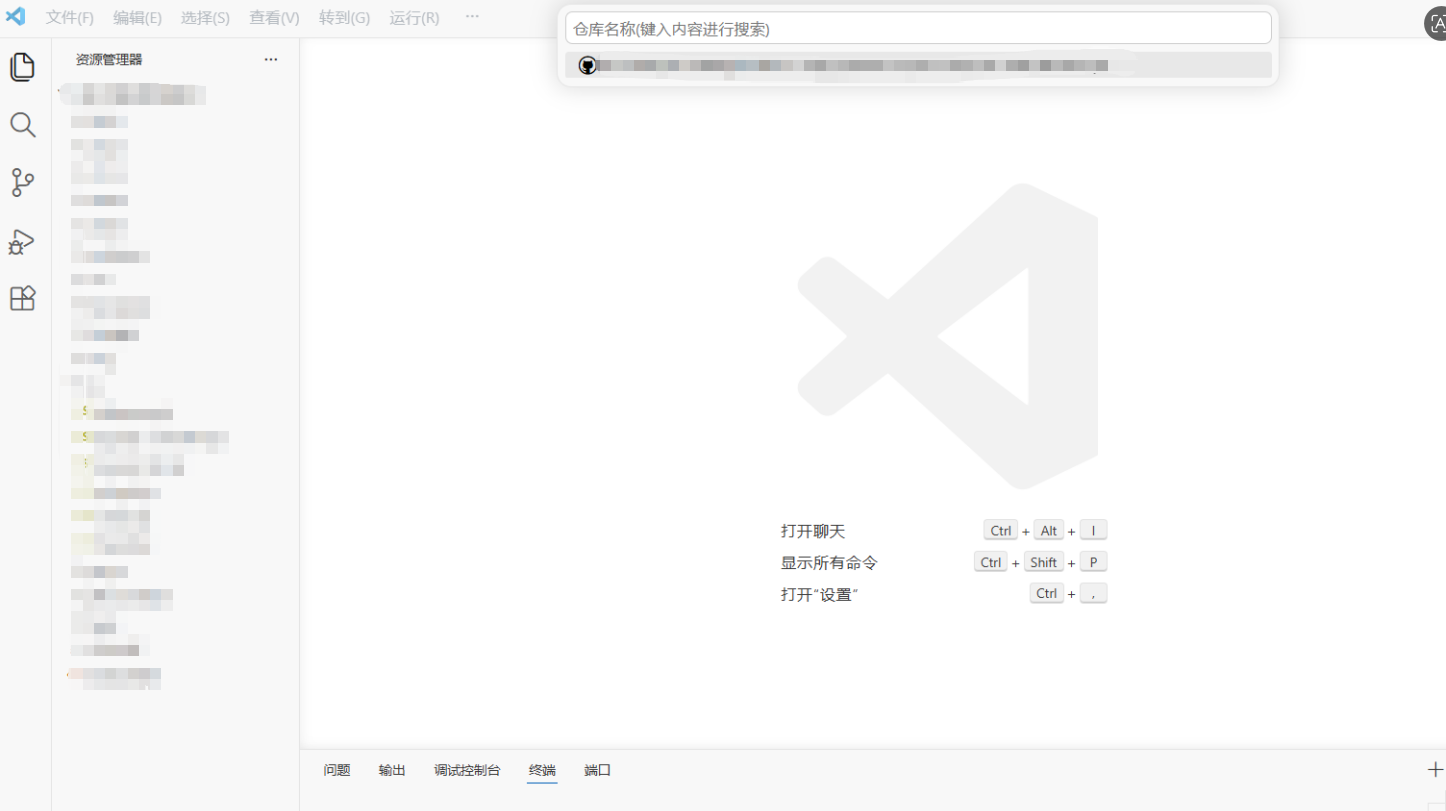
选择从github克隆,稍等就会显示出仓库,然后指定本地的一个文件夹存放即可开始自动克隆仓库。
提交修改
git基本操作,不多做赘述
git status #查看当前文件状态
git add . #提交文件到上传区
git commit -m “rebuild site” #确认本次修改内容和描述
git push #提交修改到远程仓库